A bargain you say?
 A couple of years ago, I saw a cheap 2.8 inch TFT touch screen shield for an Arduino Uno on Ebay.
It was one of the ones sold by (the late) Maplins in the U.K. They kind of scuttled their ship in the same way Radio Shack did in the U.S....But that's another story.
This one was a bargain, still in its original packaging, so I bluffed a bid, not really caring if I won or not.
I won.
I think for about 4 or 5 pounds Sterling.
Sterling is what we use in the U.K. for buying stuff.
It's similar to U.S. Dollars and Japanese Yen and, dare I say it, Euros.
However, Sterling is not worth the plastic it's printed on, takes more hard work to earn,
and buys a lot less stuff than you folks outside the U.K. take for granted.
Also a pound sterling does not weigh anything near a pound, so I have a sneaky suspicion we got shafted there too, somwhere along the line!
Anyway, I digress.....
Back to the point
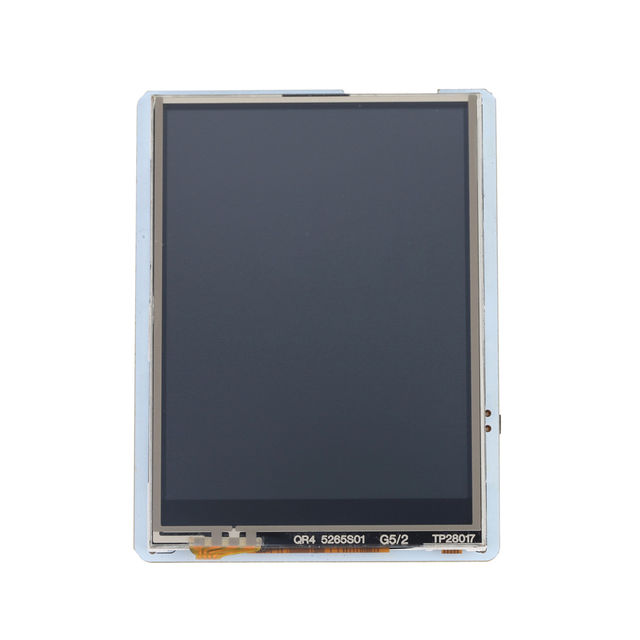
 So this is the front view (click on it for a bigger version).
As you can see, it is pretty similar to any other 2.8" TFT touch screen when viewed from the front.
Here's a link that, at the time of writing, worked.
A link
point to the back
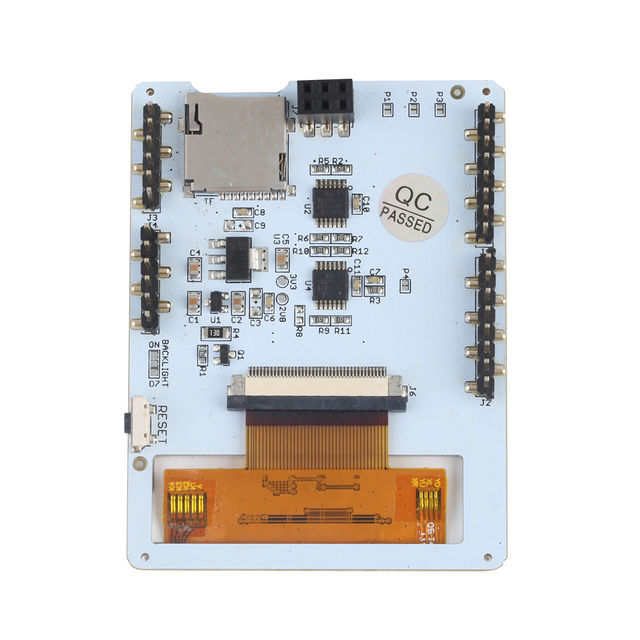
 This is the back view (click on it for a bigger version).
This tells us so much more about which type it is.
If it looks like this, it's one of these !!!!!
So. What type is it? It appears to be a Seeed Studio 2.8 TFT Touch Shield V2.0.
It's similar to all the other TFT touch screens out there, except:
It uses the ILI9341 TFT controller.
It's not compatible with the TFT examples which come with the Arduino IDE.
It is in some respects, we got it to work, but noticed .bmp files were drawn back to front in some examples.
Try creating a menu button screen backwards.
It's not compatible with Adafruit libraries without slight modification of the code.
They can be modified. We got some of their examples to work, some of them very well, but others did not compile or simply did not work.
The Adafruit TFT Shield uses the same chipset but different Arduino pins for graphics.
The Adafruit TFT Shield uses a chip to sense touch. The Seeed Shield uses analogue pins.
The Adafruit 'reset' pin is connected to Arduino digital pin 8.
What happens when you press the reset pin on the Adafruit shield is determined by code.
On the TFT shield shown above, the reset pin is connected to the reset pin on the Arduino Uno board.
Press the reset button on the Shield and the the entire system restarts.
There are many other versions of drivers, software, source and examples around the net.
However, they differ vastly from model to model, chipset to chipset, mod to mod and day to day.
Even some of the Seeed examples do not work. Not enough memory compilation errors? On an Arduino Uno shield?
How did they test that example code?
Good luck trying to find one that can draw on the screen you have AND read the touch sensor AND read/write to the Micro SD card.
I am told the Adafruit TFT SHield works with their examples.
I am either a cheapskate or simply cannot afford one.
Send me one and I will test it for you.
For now, I will crack on with the one I have at the moment.
Back to basics
 I have no intention of teaching you how to suck eggs, or anything else for that matter, or why you would want to.
I will assume you at least have a knowledge of the Arduino and the Arduino IDE.
Mostly because you have found yourself here by Googling 'Arduino' and 'TFT'.
You will need:
An Arduino Uno. I would recommend a genuine one, but to be honest, I have destroyed so many by shoving unhealthy voltages the wrong way up them, I need to keep my budget....within budget.
Which means as close to zero cost as possible.
An Arduino TFT Touch Shield of the type described above.
The Arduino IDE Installed and working.
The Adafruit_GFX and Adafruit_ILI9341 libraries added to your Arduino IDE.
Then you will need to change a few lines in the examples.
You will also need to understand this:
The TFT shield consists of several parts, which are controlled separately, but are physically sandwiched together.
They consist of a TFT display. For drawing on, using the SPI bus to send data to it.
Then there is the touch sensor. It somehow sends XY cordinates to the Arduino depending on where/if the screen was touched.
In the case of the Seeed TFT Shield, it uses two of the arduino Analogue pins.
Then there is the Micro SD card slot. Also using the SPI bus.
Think of these parts as separate entities, but controllable from the same sketch.
A word of warning
 Some TFT screens can control the backlight using a digital pin.
Some TFT Screens default to backlight ON using a trace on the PCB holding it high to 5 volts.
This IS the case with the Seeed TFT shield. Pin D7 is reserved for this.
Attempting to pull this pin to ground (to switch off the backlight) whilst the PCB trace is connected to 5 volts, may cause a short circuit and cause permanent damage to the arduino pin.
Check the Schematic, and check the PCB trace is cut. Then check it again.
>>next>>
